Online buyers often hesitate to purchase a product due to a lack of a realistic and contextual vibe. A lookbook solves this problem only if you know how to shoot it correctly.
When retailers successfully create a realistic ambiance and showcase the product’s real-world applications, customers tend to make more purchases. The lookbook provides a contextual usage scenario of the product you are selling to your customer.
After working for years and gaining extensive experience in this industry, I acknowledge that providing the best experience can significantly boost your product, and nothing else. Here, I will share what I learned about shooting a lookbook and whether it is essential.
Table Contents
What is a Lookbook?
A lookbook is a combination of images that showcase clothing, accessories, or lifestyle products in a realistic setting. You can call it a visual catalog for products, providing customers with an idea of how to use the product effectively.
With lookbooks, retailers showcase the best possible way to use their products. They use models and real-world scenarios to give customers a realistic feel. You can shoot two types of lookbooks: one is a studio lookbook, and the other is a contextual lifestyle lookbook.
The studio lookbook offers a clean and minimal design, entirely focused on the product. On the other hand, a lifestyle lookbook provides information and gives customers ideas about the real-world usage of the product.
Why Learning How to Shoot a Lookbook Matters?
So, giving customers a realistic feel isn’t the only goal that a lookbook serves. A perfect lookbook helps to enhance the brand identity. Not only that, if you crack the code, it can boost your engagement and 3x your sales.
You can use your lookbook in your marketing campaigns. If the lookbook is that good, then you can use it on your website, send it in an email newsletter, and even run paid ad campaigns.
Now, the real question is how to create a perfect lookbook that takes your business to the next level.
Professional Guideline On How to Shoot A Lookbook

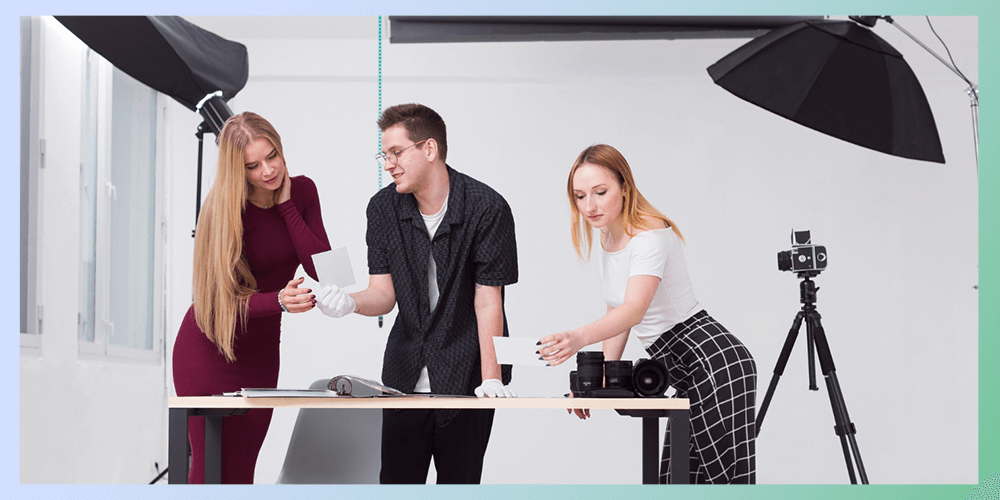
There are three phases of shooting a perfect lookbook. One is pre-shooting planning, the second is the actual shooting, and the third is post-production work. Both are equally important if you want to create an outstanding lookbook.
Pre-Shooting Phase
Before going into real action, you have to plan the entire thing, and this phase is important as hell. There are four major steps that you must take in this phase to make it count.
Understand Your Brand and Target Audience
I know it’s an obvious thing, but many marketers and even photographers forget or lose their way while creating a lookbook. Every brand should stand for something, and you have to understand it first. Because if you don’t get what your brand talks about, your customers won’t either. I have seen many brands go unnoticed for that reason. Know your brand, and then target your audience.
Develop a Creative Concept
A lookbook should tell a complete story or a journey. As lookbooks are a creative thing, with my experience, I have seen many make a mess by trying too much. Always create an innovative and imaginative concept that is easy to understand. It should convey the essence of your lookbook shoot and be clear and concise.
Create a Mood Board
Developing a creative concept will set the vibe of your lookbook shoot, but creating a mood board will decide the color palettes, poses, backgrounds, and lighting styles.. You research and collect sample images through Pinterest or even Google.
Build a Shot List and Production Schedule
Now you will have a clear idea of what you want to achieve from your lookbook. Based on that, you should now build a shot list and production schedule. Basically, you will list the plan for the products you will use in the lookbook and how you will shoot them. The list should have the following things
- Outfit numbers
- Model assignments
- Poses or angles needed
- Special notes for accessories or props
Shooting The Lookbook: The Real Action Begins
If you have completed your pre-shooting plan perfectly, then creating a perfect lookbook shot is a straightforward process. I am sharing some significant steps that have worked for me, and they will also work for you.
Choose the Right Location
Selecting the correct location is a crucial first step. Based on your shooting requirements, choose the best-fit location. If you’re shooting a studio lookbook, opt for a proper studio setup. If you want to shoot natural scenery, find the best location.
Select Models Who Represent Your Brand
With my experience, I want to tell you one thing that do not just pick a good-looking model and start shooting. No matter how famous or fan following a model has, if their looks don’t align with your brand, it won’t work. Look for models that match the vibe of your brand, and then the lookbook will be an instant hit.
Prepare Outfits and Accessories
According to your pre-shooting plan, prepare your outfits and accessories before arriving at the location. Organize your steam garments, pack accessories, and prepare backup pieces as well. A wardrobe stylist on set can ensure everything stays polished.
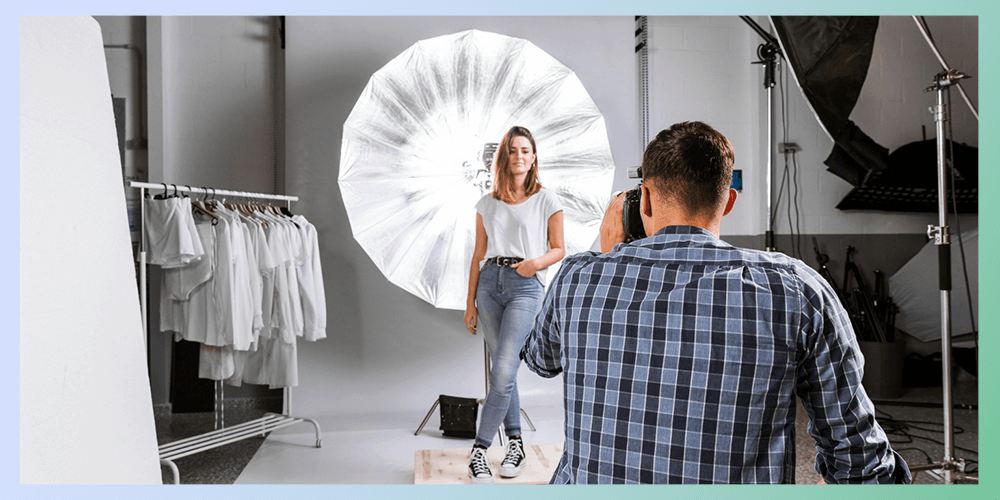
Set Up the Perfect Lighting
Lighting is one of the most crucial parts in this phase. Good lighting is non-negotiable, and always avoid harsh overhead lighting that can cause unflattering shadows.
- Studio lighting: Use softboxes or umbrellas for even, flattering light.
- Natural lighting: Early morning or golden hour (just after sunrise or before sunset) offers soft, beautiful light.
Capture a Variety of Shots and Angles
While you start shooting the models, always remember to keep the backups. Capture a variety of shots from different angles. Because in the post-processing, you don’t know which images are going to match your goal. Variety keeps your lookbook dynamic.
- Full-body shots
- Close-ups on details
- Movement shots (walking, twirling, candid laughter)
Different perspectives help show off the texture, fit, and flow of the garments.
Direct the Models Effectively
Sometimes, your models overlook minor details in their poses. It’s your responsibility to direct he models according to your needs. Try to keep photos from different angles and poses. It will make your lookbook alive and effective. Suggest poses that you believe will align with the brand.
Maintain Consistency Throughout the Shoot
People often ignore this step and make a mess of their lookbook. Consistency is the secret of success that most of us know but ignore. Maintain consistency throughout the shoot, and you will be able to produce the perfect lookbook for your products.
When you shoot consistently, your lookbook gets a look that feels cohesive, intentional, and visually compelling, telling a unified story through every frame.
Phase Three: The Post Production
After a successful shoot, it’s time to work on the table. In post production, you set the vibe exactly how you planned with the perfect color grading, retouching, and many more.
In the post-production table, you get the liberty to edit and sometimes fix the minor issues. Some major post-processing techniques that you should try are
- Color grading
- Cropping & composition
- Branding integration
- Retouching
Wrapping up….
When you want to create a brand that stands still in the crowd, a lookbook can be one of the master stroke steps that you can take. So, if you know how to shoot a lookbook perfectly, it gives you an edge over your competitors.
So, whether you’re aiming for minimal elegance or bold creativity, the key is consistency, clarity, and attention to detail. With the right preparation and creative direction, your lookbook becomes a powerful visual tool that not only showcases your collection but also leaves a lasting impression on your audience.